 Mazda 323F GT
Mazda 323F GT
Noise insulation install
There was only one excuse which explains why I’ve started this bloody work on my car – I thought to check all cockpit for the rust marks so anyway had to disassemble all the interior… otherwise I can hard to believe the person in clear mind would like to do this without been painfully forced :)
So the story is… I don’t like BMWs and Mercs, and especially all their owners (even most of my friends actually are BMWer). But there is one thing I always had to admit about German cars in comparison to my Mazda – solid feel of a car body. Well build, well felt and when you closing the doors that sound of one piece of a metal but not the sound of a can. I love my car but not the sound of sand in the wheel arches or engine noise or exhaust rattle or plastic panel squeaks. Especially during winters. So I gave up. I knew it wouldn’t be easy and quick mod but in general that could be a good chance to inspect every inch inside the body and check for the rust if any. That was the beginning of the story.
So first of all you will need to find and get a set of sound deadening material. In general you will need few different types for different goals.
1. You need to stop metal body panels to resonate. (especially if you have a good ICE install and especially inside the doors). This is low freq vibrations.
2. You need to kill the high frequency from the wind noise etc.
3. You need to reduce the mid freq. for any other sound to make car quiet from inside.
So we are talking about at least three different types of materials to kill the sound. I’ve managed to find all three types and here they are:
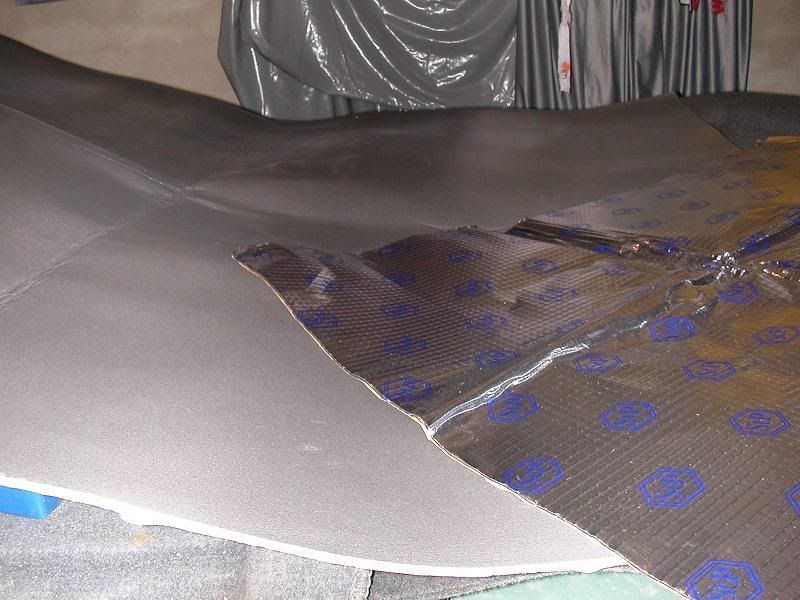
1. Vibroplast for low freq. Corrugated aluminum foil on a 5mm bitumen layer. Self adhesive. Sheets around 80x70cm. You will need near 16 sheets, 9$ each.
2. Polyurethane foam 6 mm thick self adhesive for high freq. 11$ each – need 6 sheets 100x90cm.
3. Foam-rubber impregnated with bitumen. Self-adhesive 10mm . Sheets 110x90, 15$ each require 3-4 sheets.
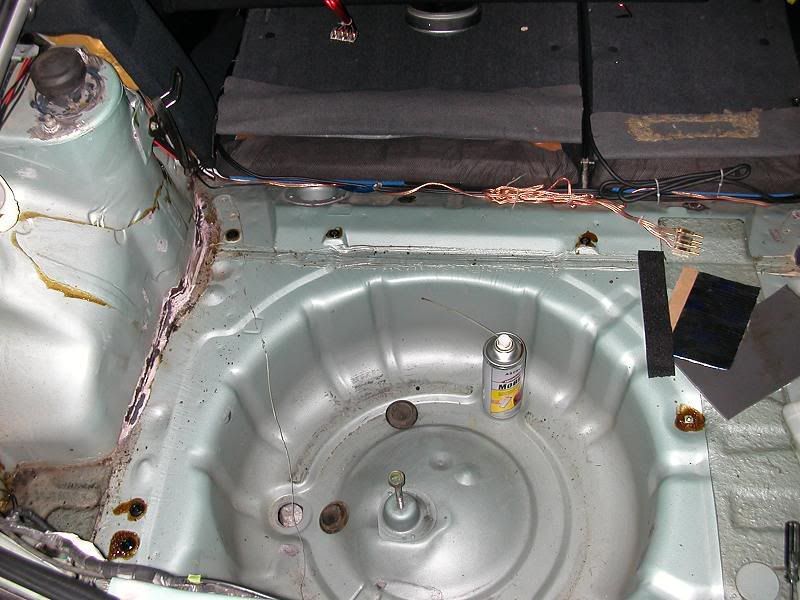
You will need to disassemble the entire saloon. Ideally you need to do the roof as well but in my case I left the roof for the future doing only up to the windows level. Had to remove most of the interior and carpets. Somewhere need to unfasten the wires to have a clear access to the metal body. After this you would be surprised how little noise insulation stuff our cars have – mostly clear metal panels.
Then I’ve used this chance to check and clear all rust spots I can find. It took most of the time to clear the rust, locate the seams with little rusty marks to open them, to remove original Mazda protection seals which no longer can protect the body (something like a silicon tape), convert the rust, fill the seams with rust protection stuff, paint it over – tons of hrs to spend :) hope it will help a bit.
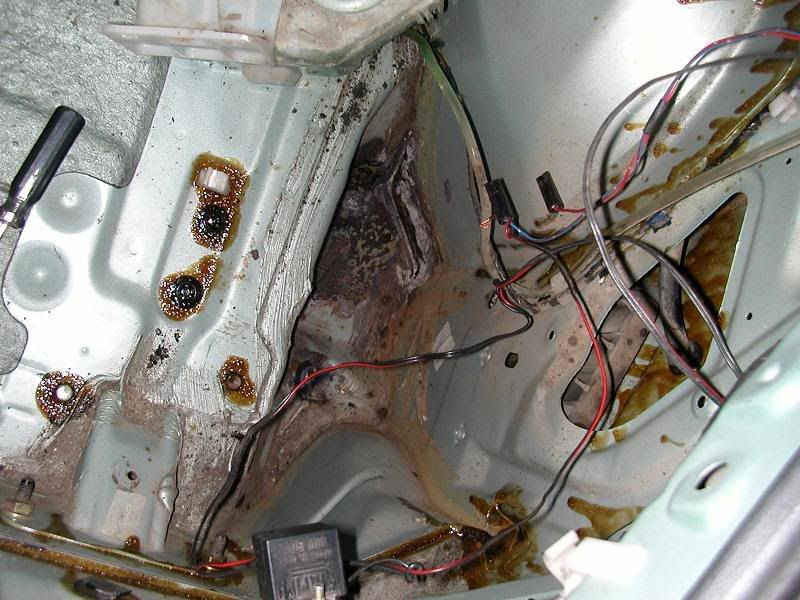
Don’t ignore also this chance to protect you car body from rust and to do a rust protection of a hidden cavities. Keeping in mind that everything is disassembled you will have an absolutely unique chance because all technical holes to access the inner-cavities would be easily accessible – opened. Don’t waste this chance to safe 200-400$ you will have to pay to the car service to do this job for you also keeping in mind they will never do it so carefully like you will for your own car. Get 4-5 pressurized cans of Movil or any other type of rust-protector-for-hidden-cavities. They usually have a thin tube you can use to spray the content deep inside the holes. So spray all cans into the holes trying to cover everything from inside. Don’t safe the fluid – just let it fill everything from inside. It took me two complete cans for example per each side (dam) of the car. The same story inside the doors, under the car etc.
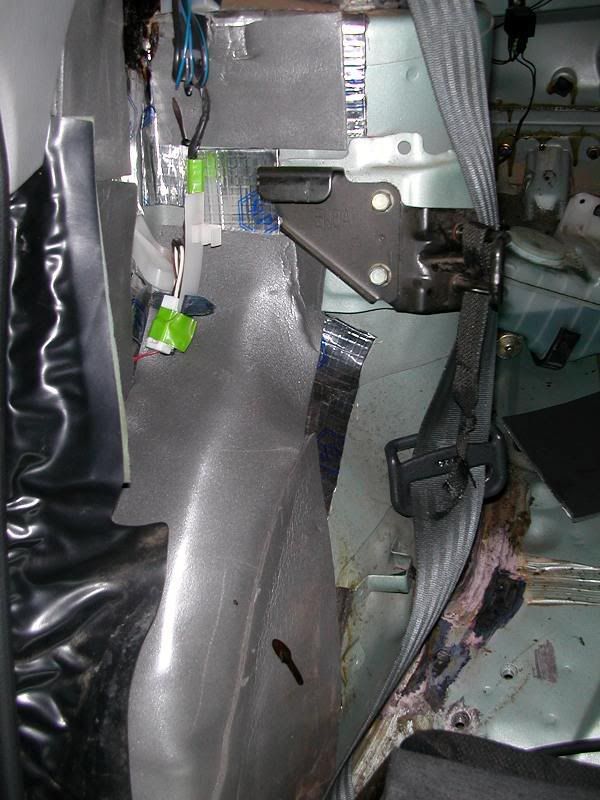
This is for example the picture from the place where the rear window washer tank been installed, there were a lot of rust deep inside:
At this stage the good choice would be the vacuum cleaner – to clean all body from sand and dust so self adhesives will work well.
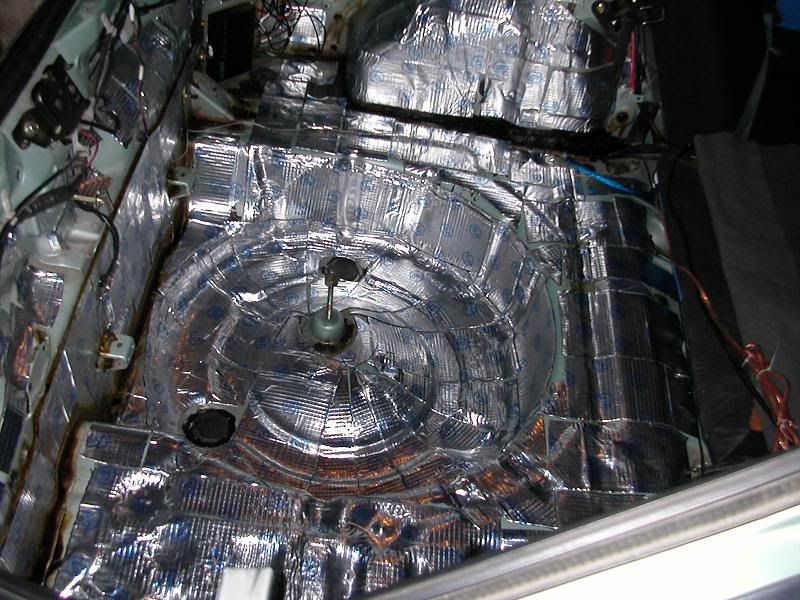
Most time consuming part is the exhaust tunnel – it has a complicated shape so had to cut a lot of small pieces to cover the area.
First layer usually goes Vibroplast – heavy material, installed directly to the clear metal sections of the body. You need to cover all straight metal parts. Pay special attention to the wheel arches – you probably would need to use a small cuts of the material to cover the surface. Do not need the cover 100% of the body – 60-70% could be enough. A good check is to knock to the processed part – instead of empty bucket sound there should be a solid knock.

Small advice – do not cover completely the seams – just in case there would appear a rust there in the future at least you will notice it before you legs will fall through.
Don’t forget to leave all necessary mounting holes unclosed otherwise you will not be able to assemble everything back together.
Few additional words concerning processing of the doors. You will need to make two layers actually. One layer of vibroplast should be attached from inside the door to the outer side. There are a large metal straight areas there so they need to be processed. The complexity is that you will have access there only through door holes so will need to work in a closed space, using small pieces of vibroplast and without possibility to see what you doing there. You don’t need to cover corners or complex parts – just put a couple of sheets over the straight sections – should be enough. Then the second layer you will use to close all the holes on a door internal side. Usually there is a thin polyethylene film which should be removed completely and all holes covered by the virboplast sheets. Don’t forget about door lock levers – you need to leave a free space for them to move (cut the material arround levers).
Then it goes a layer of foam for high freq. It would be installed over the clear metal parts as well as over the vibroplast covered areas. Again you need to cover the entire area but this time paying special attention to cover as much as possible. The material is easy to install so you can use a big pieces to cover a large areas. But you need to remember this material is a highly squeaky during winter time so don’t put it in a places of direct contact with a plastic interior parts – otherwise it will annoy you all the time. I’ve used it all over the body under the carpet area in the saloon and in the boot.
And the final but very important is a rubber-foam layer. Because of its softness I’ve used it all over the plastic panels from inside. Door panels, boot panels. It’s very adhesive, easily shaped material you can cut in any way. Very important thing – when processing door panels don’t forget to leave a free space for lock levers – otherwise foam will push on to the levers and the locks will not work. The good thing about this foam is that its self shaping as soon as you will put the panel in place and will keep this form after that. All you need to worry is to push heavily at first :) Also this foam prevent panels from moving and squeaking during driving.

This is basically all about the process. Now few words concerning the result…
Bloody hell, mates ! The first time I’ve closed the first processed door was like a first kiss… Amazing sound and feel of a bulletproof armor. It feels a bit heavier, but not too much and the door is no longer "sound" itself. It is really a quiet thing now. Oh my god it’s like I’ve got a completely new car from a manufacturer :)
Much recommended even it costs (270$ just materials without work)…make car heavier and took a lot of time to install (if you decided to do it yourself).
Kira aka Aprilia, 2007